
🎨 Use your own 3D model
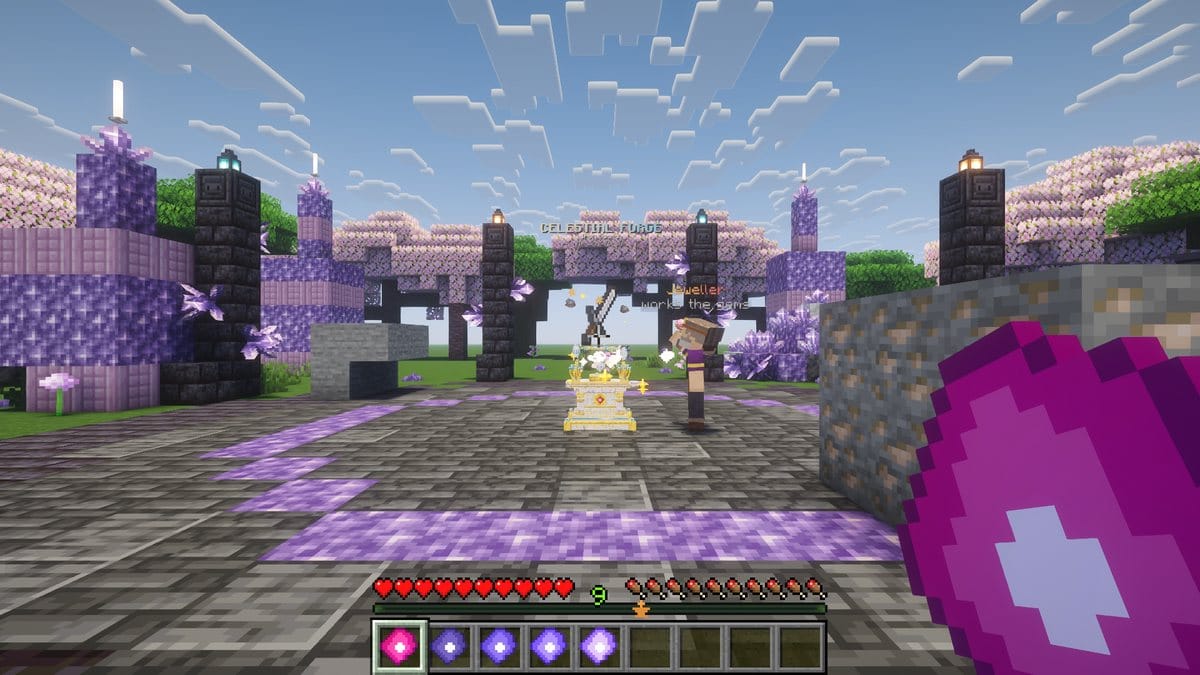
A gem can use a generic cut or your own model.
model: in the gem | Look | What you need |
|---|---|---|
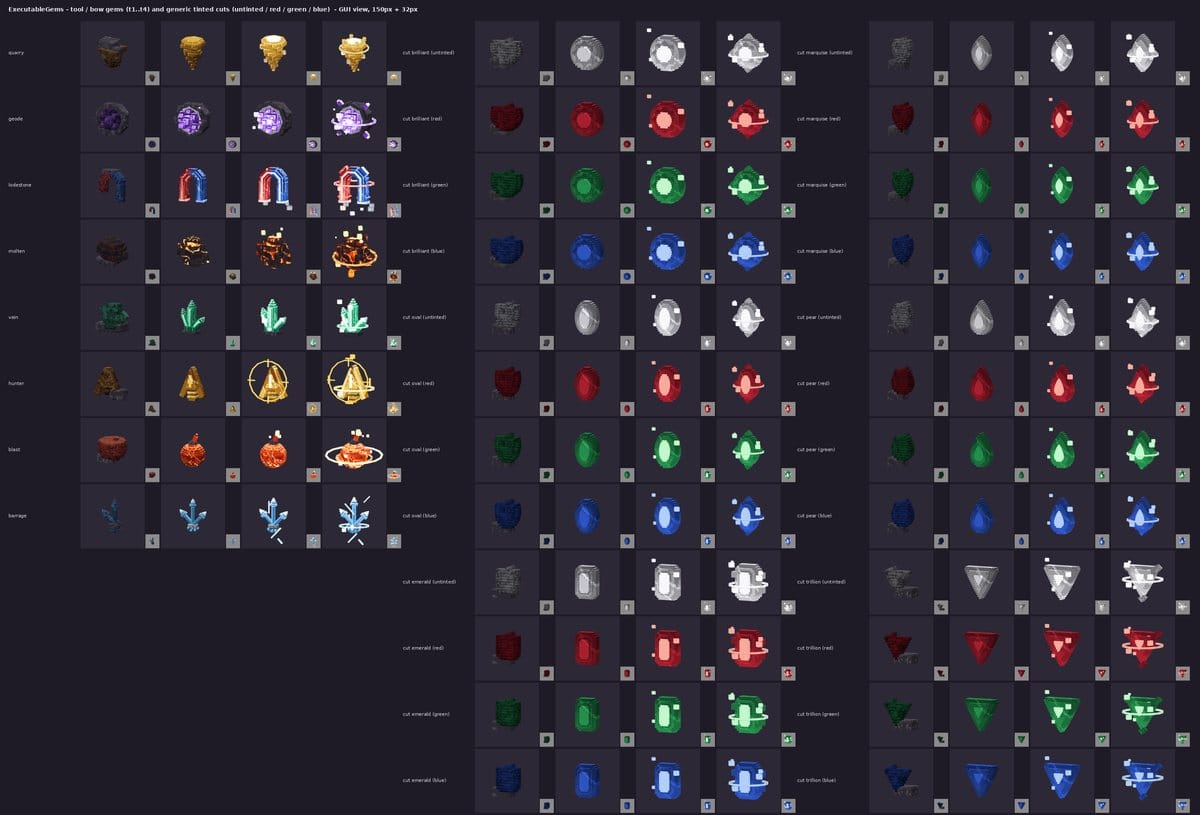
cut:oval | A generic gem tinted with your colours, 4 tiers, animated | Nothing |
my_pack:gems/blood_opal | Your model, the same at every tier | 3 files |
star_opal | Your models, one per tier | 16 files |
If you don't want to make a model
model: 'cut:marquise'
color: '#7bc96f'
color2: '#fff2a8'
color is the body and color2 the inner light. You can stop here.
How your files reach the players
You don't need to make a zip or find a host.
ExecutableItems already sends a resource pack to your players. It is built from this folder:
plugins/ExecutableItems/__textures__/ExecutableItems_Pack/
So you add your files inside this folder, then run one command. That's the whole process.
Add your files to this folder. Don't create a second folder next to it: ExecutableItems only sends one.
If the folder doesn't exist, run /ei download-default-pack.
Tutorial: a gem with its own model
We will give the Blood Opal a model of its own. Replace blood_opal with the name of your gem everywhere.
1. Create the 3 files
Go to plugins/ExecutableItems/__textures__/ExecutableItems_Pack/assets/ and create this:
assets/
└── my_pack/
    ├── items/
    │   └── gems/
    │       └── blood_opal.json       (1) the item
    ├── models/
    │   └── item/
    │       └── gems/
    │           └── blood_opal.json   (2) the model
    └── textures/
        └── item/
            └── gems/
                └── blood_opal.png    (3) the image
my_pack is your own name for the pack. Use only lowercase letters, numbers and underscores in all the file and folder names.
File 1: the item. assets/my_pack/items/gems/blood_opal.json
It tells Minecraft which model to use.
{
  "model": {
    "type": "minecraft:model",
    "model": "my_pack:item/gems/blood_opal"
  }
}
File 2: the model. assets/my_pack/models/item/gems/blood_opal.json
For a flat item like a vanilla diamond, this is all you need:
{
  "parent": "minecraft:item/generated",
  "textures": {
    "layer0": "my_pack:item/gems/blood_opal"
  }
}
File 3: the image. assets/my_pack/textures/item/gems/blood_opal.png
A square PNG, such as 16×16 or 32×32. To try the tutorial, save this example. The plugin also uses this image as the small icon in tooltips.
2. Use a real 3D model (optional)
Skip this step if a flat item is enough.
- Make your model in Blockbench, in the Java Block/Item format.
- Use File > Export > Export Block/Item Model, and save it as File 2, in place of the JSON above.
- Save your texture as File 3.
- Open File 2 in a text editor and check its
texturessection. Each texture must point to your image:
"textures": {
  "0": "my_pack:item/gems/blood_opal",
  "particle": "my_pack:item/gems/blood_opal"
}
File 1 doesn't change.
3. Link the gem to the model
In plugins/ExecutableGems/gems/custom/blood_opal.yml:
model: 'my_pack:gems/blood_opal'
Here is how the value matches File 1:
| In the gem | Becomes in the pack |
|---|---|
my_pack | assets/my_pack/ |
gems/blood_opal | items/gems/blood_opal.json |
4. Send it to the players
Run these two commands, in this order:
/eg reload
/ei refresh-pack
The new pack is sent to the players who are online, without reconnecting. Those who join later get it automatically. It takes a few seconds, and players may see a short loading screen.
5. Check the result
/eg give YourName blood_opal 7
The gem has your model, and your image shows next to its name in tooltips:
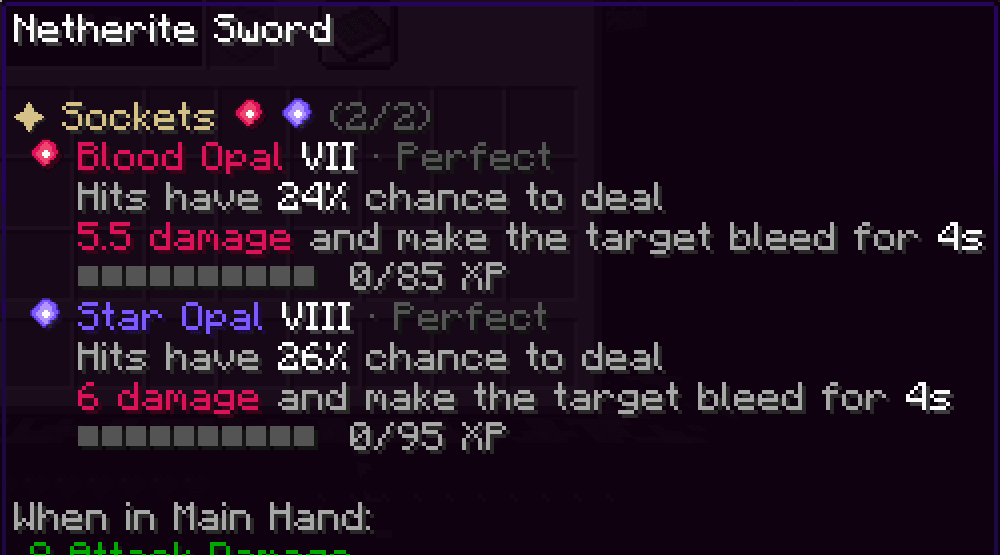
A gem using this kind of model always has the enchantment glint.
One model per tier
Do you want the gem to change at each tier, like the shipped gems? Write its name without : in the gem:
model: star_opal
The plugin then looks for 4 models in the ei namespace, and 4 icons. In the same assets/ folder:
assets/
├── ei/
│   ├── items/gems/
│   │   ├── star_opal_t1.json
│   │   ├── star_opal_t2.json
│   │   ├── star_opal_t3.json
│   │   └── star_opal_t4.json
│   ├── models/item/gems/
│   │   ├── star_opal_t1.json
│   │   └── ... (t2, t3, t4)
│   └── textures/item/gems/
│       ├── star_opal_t1.png
│       └── ... (t2, t3, t4)
└── executablegems/
    └── textures/item/icon/
        ├── star_opal_t1.png
        └── ... (t2, t3, t4)
t1 is Chipped, t2 Flawless, t3 Perfect and t4 Radiant. The icons in executablegems/ are the small images shown in texts, and the shipped ones are 32×32.
An item file, here for tier 1:
{
  "model": {
    "type": "minecraft:model",
    "model": "ei:item/gems/star_opal_t1"
  }
}
A model file, for a flat item:
{
  "parent": "minecraft:item/generated",
  "textures": {
    "layer0": "ei:item/gems/star_opal_t1"
  }
}
Then run /eg reload and /ei refresh-pack.
Each time you change something
| You changed | Run |
|---|---|
| A value in the gem's file | /eg reload |
The model: of the gem | /eg reload |
| A file of the pack | /ei refresh-pack |
If you host your pack yourself
This is only for servers that don't use the folder above: selfHostPack: false in the config of ExecutableItems, or a pack set in server.properties. In that case /ei refresh-pack can't help.
- Add the same files to the
assets/folder of your pack. - Make a zip with
pack.mcmetaandassets/directly at its root, not inside another folder. - Upload it again and update its link and hash. See Uploading a texture pack.
- Players reconnect to get it.
Your pack and the ExecutableGems pack work together: Minecraft stacks them.
Common mistakes
| What you see | Cause | Fix |
|---|---|---|
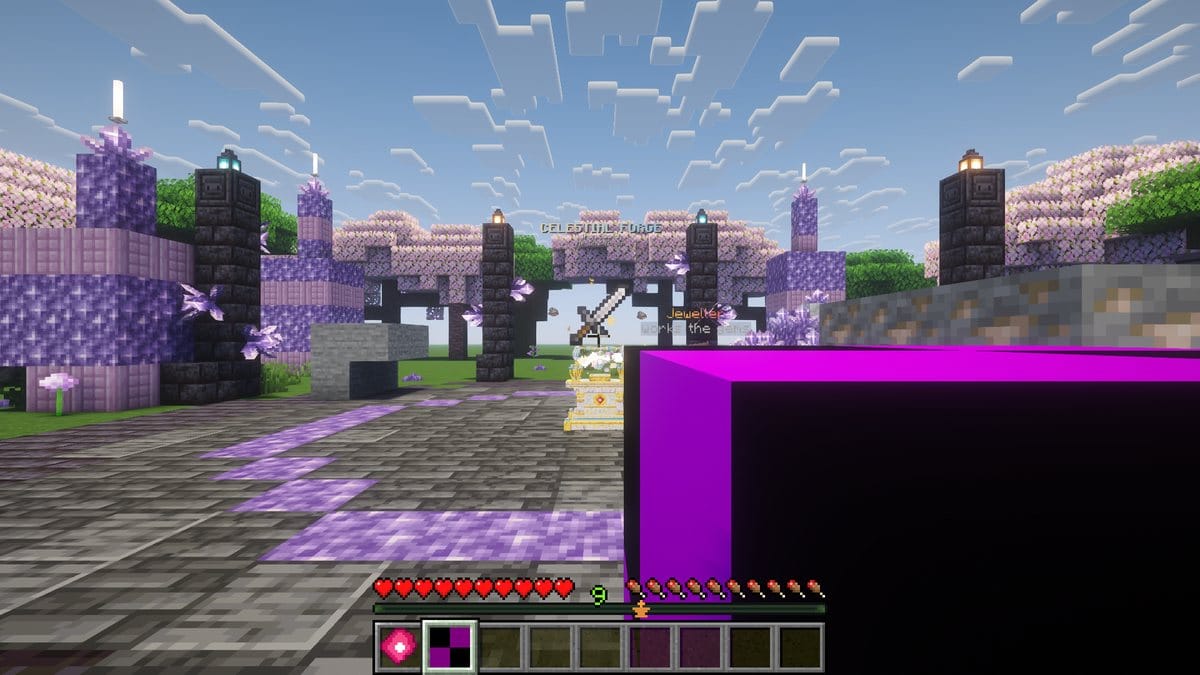
| A black and magenta cube | Minecraft can't read File 1 or File 2 | Compare model: in the gem with the path of File 1. Check the commas and quotes of the JSON files, and use only lowercase letters, numbers and underscores in the names. |
| A black and magenta item with the right shape | Minecraft can't find the image | Check the path in File 2 and the location of File 3. |
| Nothing changed | The pack wasn't sent again | Run /ei refresh-pack. |
/ei refresh-pack says to set selfHostPack | You host your pack yourself | See the section above. |
| A square instead of the icon in tooltips | The icon image is missing | Add File 3, or the 4 icons for one model per tier. |
Don't edit plugins/ExecutableGems/pack/ExecutableGems_Pack.zip: it is replaced at each start. Your files go in the folder of ExecutableItems.